Friday 15 November 2013

Baby Shower cake

I love baby showers and think they are a lovely opportunity to welcome and celebrate a new life coming into the world so I was delighted when i was asked to make a baby shower cake. I've always admired baby shower cakes that look like baby bums so i was happy when a friend sent me a picture of one asking if I could make it for her baby shower. She didn't find out the sex of her baby so she went for a neutral lemon coloured cake. I loved making this cake and was really happy with how it turned out. I looked at several ways of making the legs and feet including wrapping icing around Rice Krispie cakes moulded into the shape of legs or using Swiss rolls as leg shapes. I was unsure how that would turn out so I just went with the technique of using just icing and rolled and moulded it into the shape of legs, I felt it might look more realistic like that. And it worked. This cake has been one of the favourite cakes ive made so far and I would love to make again! 


Friday 30 August 2013

County Kerry cake

A County Kerry Irish themed cake for a 50th birthday. I made the coat of arms myself by copying a picture off the Internet and added shamrocks to make it just a little bit more Irish! Up the kingdom!


Xoxo

Saturday 25 May 2013

Giant cupcake..

I made this cake recently for a work colleague (another one) and it was the first giant cupcake I have made in a while. I looked at a few on the internet and got some inspiration from some of the ones I looked at. The person I made this for is a huge lover of chocolate so this was a major chocolatey cake. Chocolate sponge with chocolate buttercream centre, chocolate buttercream frosting, chocolate fingers and malteasers.... chocolate chocolate chocolate! I loved making this cake, it looks so effective and delicate but didn't actually take that long to decorate. I found a lovely giant chocolate cupcake recipe and it tasted lovely, moist and chocolatey and although it took an hour and a half to bake, it turned out lovely and was worth the wait! I will definitely be making more of these in the future... I think they make a lovely gift.

First Holy Communion Cake and Cupcakes

Its Holy Communion Season so I have been busy baking some holy communion treats for some family friends.
I looked at a few ideas on the internet and for the cupcakes I went for a simple cross design on blue buttercream. I didn't buy a cross stencil but used a cross cake topper and cut around it for each cross, it was a bit time consumed but a cheaper option than ordering a cake crosser ( I left it too late to order one)


For the cake I used letter embossers and wrote a simple message on the top of the cake finished off with the date of the holy communion. Last year I bought a large cross embosser so I used that again this year for the large cross and it looked lovely.

I put the cake and cupcakes on a stand and it looked lovely. A simple yet classic cake for a special day.

Bristol Rovers cake

I made this cake for a work collegue recently for his little grandsons. They hate football and love rugby so to wind up their parents, he decided he wanted to have a bristol rovers cake for them! A simple cake personalised with their names and the Bristol Rovers saying 'Little gasheads' it was a sweet treat for two adorable little boys... hopefully it will convince them to support the team their grandad is so passionate about!

Tuesday 16 April 2013

After Eight Cupcakes

Hi everyone,
     I wanted to try and make some cupcakes that I hadn't made before that I thought would be to everyones taste and a real chocolatey treat and I came across a recipe for After Eight cupcakes on a brilliant blog site called anniesnoms.com. She has an amazing collection of cake recipes in order from A-Z... its fair to say I was salivating at the recipes before I even got to C!! First one on the list is After Eight Cupcakes and I thought oooo they sound good (and my work collegues are chocoholics so I knew they would go down well!) so I thought yep Im going to make them ones...and I did! Usually I am not a great fan of chocolate sponge with a chocolate topping myself... but these were definately an exception! I thought I would share the lovely recipe with you all so you could make them for yourselves and see how good they are. The recipe is so easy to follow and the decoration is simple. From prep time to decoration, these cakes took me about an hour and a half to do, including cooling time so not that long!
 Delicious and quick... What more could you want!


After Eight Cupcakes recipe
Makes 12

Recipe from Recipes From a Normal Mum

Ingredients for the cupcakes:

> 100g plain flour
> 1/2tsp bicarbonate of soda
> 1tsp cream of tartar
> 20g cocoa powder
> 100g dark brown sugar
> 120g butter/marg
> 2 eggs
> 1tsp vanilla extract
> 25g natural yoghurt

Ingredients for the ganache:

> 1tsp peppermint extract
> 100g dark chocolate (original recipe called for white chocolate, I wanted to add to the decadence so used dark)
> 50ml double cream
> 12 After Eight Mints, broken up into rough pieces to garnish

Method:

> Preheat the oven to 160 degrees C and line a cupcake tray with 12 liners.
> Sift the flour, bicarb, cream of tartar and cocoa into a medium sized bowl and stir until mixed.


> Place the butter and sugar into a large bowl or the bowl of your stand mixer.
> Beat until light and fluffy, about 2 minutes.


> Add in the eggs and vanilla extract. Mix until well incorporated.
> Add in the flour mix and natural yoghurt.


> Mix until well combined, about 1 minute on med-high speed.


> Divide between the cupcake liners, about 2/3 full.
> Place in the oven for 20-25 minutes until an inserted skewer comes out clean.
> Transfer to a wire rack as soon as possible to cool.
> Once cooled completely, start on the ganache.
> Place the cream into a small saucepan and over a low heat, bring to a simmer.
> Whilst the cream is heating, break the chocolate into a heatproof bowl.
> When the cream has come to a simmer, take off the heat and pour over the chocolate. Stir until all the chocolate has melted and then add in the peppermint extract and mix until combined.


> Spoon the ganache onto the top of the cupcakes and smooth with the back of the spoon. About a teaspoon per cupcake.
> Place the broken After Eights on top of the ganache to finish the cupcakes off.
> Will keep in an airtight container in the fridge for up to 3 days.

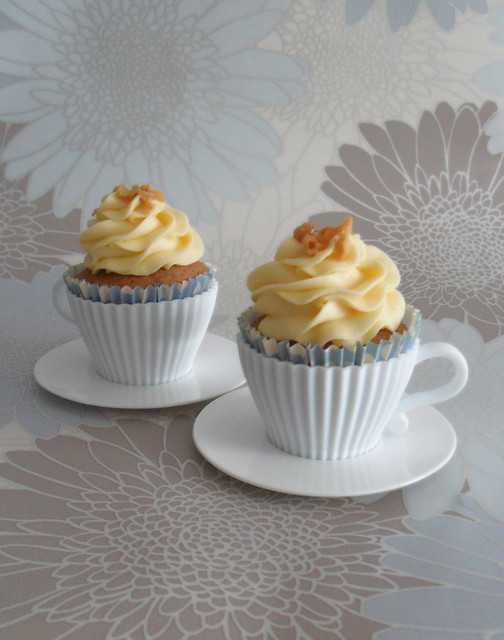
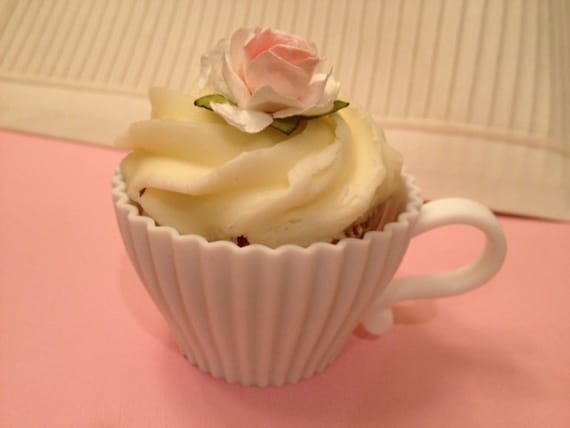
And this is the finishing product...


Over to you cakebakers :-)
xoxo


Sunday 7 April 2013

Teacup cupcakes

I am loving cupcakes in teacups at the moment and think they are so adorable and creative! I think they are really nice for when you have friends over or for a little after dinner treat that look different to a normal cupcake. I have been looking at so many pictures online and have added a few of my favourites to this post so you can all have a look. I have some silicone teacup moulds like these ones (to the left)....
that I plan on using soon (watch this space) but in the mean time.... oogle at these little beauties...

Teacup cupcakes can be baked in silicone moulds like the ones below or they can be baked in the usual way and placed in a china teacup for a more vintage tea party look and I think both are fab!


I think using vintage teacups give teacup cupcakes a different look to the silicone moulds because the cupcake is tucked into the cup after they have been baking in wrappers. These make lovely table decorations for a tea party/wedding/buffet.


 I also came across these creative cupcakes which I thought were cute and have a teacup theme, without the use of a teacup!


Happy Easter

Hi Cakebakers!
    I hope you all had a lovely Easter break and made some delicious yummy treats to share with your families and friends. Last year I made some chocolate cupcakes with a mini egg nest on top so I thought I would try something a little different this year.

I found a really interesting recipe online for creme egg cupcakes, baked with a creme egg inside so I thought I would give them a go!

As recommended in the recipe I found, I froze the creme eggs ( taken out of their wrapper and put in a freezer bag) and done this the night before I planned on making them. This is done to prevent them burning/melting inside the cupcakes whilst they are baking.

I used a chocolate cupcake recipe to make the cupcakes and half filled the cupcake wrappers with the mixture....like this...

I didn't pour any more mixture into the cases as I thought they would rise too high and spill over (but perhaps I should have as the recipe recommends pouring further mixture over the creme eggs).
The cupcakes rose perfectly and smelled delicious when they came out of the oven.
 
I decided to decorate the cupcakes like an egg, white vanilla buttercream topped with a dollop of yellow buttercream to resemble the yolk of an egg... then top the cupcakes with another creme egg.
 
Me being me, I decided to cut into a cupcake to look at what I hoped would be a delicious gooey egg inside but that didn't happen! There was evidence that a creme egg had been put in it, but the gooey centre had leaked out into the cupcake mixture and stuck to the bottom of the cupcake wrapper so just the shell of the creme egg remained.... I was a little disappointed!


Despite this.... they still tasted fab and my workmates enjoyed them! Some of them were lucky enough to get part of a creme egg inside that hadn't melted!
 
I am not sure why the eggs split in the cupcakes but think it might be because of one of the following:
1) I didn't pour mixture over the cupcakes once they were in the wrappers
2) I might have pushed the creme eggs too far into the mixture so that the bottom of them were touching the bottom of the cupcake wrapper, therefore were close to the tin and the heat melted them
3) I should have let the cakes bake slightly before pushing the creme eggs into the mixture.
 
Next time I make these I think I will try a different method. After looking a bit further online I found a different method to make creme egg cupcakes which might work better:
 
I think I will try this method the next time so that the taster has a flavour of the creme egg with every bite.

If anyone has any tips for how to stop the creme eggs leaking inside the cupcake batter...feel free to share your knowledge...it would be welcomed :-)  

Happy Easter!!!
xoxo

Saturday 16 March 2013

Princess Castle Cake

Hi cakebakers!


My latest cake creation was for my niece's 3rd birthday. She is a Disney princess fan and looks all things princessy so I decided to make her a Disney princess cake. As usual I stated my planning by browsing the Internet looking at all different types of Disney princess cakes and some of them are absolutely stunning! As an amateur cake baker I didn't want to set my standards too high and be disappointed with how the cake would turn out so I tried to keep it as simple as I could!

This was the first two tier cake I made and to be honest I wasn't sure how it would turn out and if I would do it right. I baked a 9 inch cake and a 6 inch cake... both vanilla sponge cakes. I sandwiched both with vanilla butter cream and raspberry jam and crumb coated them. For each cake I set them on cake boards the same size as the sponges, so a 9 inch board and a 6 inch board, a nice and thin board so that they wouldn't be seen when put on the larger cake board.

Whilst the cakes were crumb coated I worked on some of the other details for the cake including the turrets. For the turrets I used cardboard tubes... like those you find when you finish a roll of toilet paper or kitchen towels... Make sure they are all the same size/width. I used the smaller type as my castle cake wasn't going to be massive, kitchen roll tubes would be great for a larger cake.
 
I rolled out pale pink sugarpaste and used a brick embosser ( one of my fave sugarpaste tools) and made an imprint into my sugarpaste. I then wrapped the sugarpaste around a tube and trimmed it to size. To seal the edges I gently pressed the edges together using my fingers. To make the points on the turrets I used regular ice cream cones which are available in every supermarket. I chose the cones with the pointed bottom, the flat bottom cones could also be used for a different look.
 
I coated my cones in baby pink butter cream and then coated the cones in edible pink glitter. I then sealed the cones onto the turrets using edible glue. They then looked like this....
 
 
I set the turrets aside and began to ice the 9 inch cake with baby pink sugarpaste. Once this was done I placed the 6 inch cake on top and used an edible pen to mark the four corners of the where the 6 inch cake was going to sit. I did this so that I could see where I needed to put dowels into the 9 inch cake. Dowels are inserted into cakes with 2 or more layers to support the bottom layer so that the top layer does not sink into the bottom layer.
 
Dowels come in different types, sizes etc.... I will blog about them in more detail another time (note to self). I used plastic dowels for this cake, bought from a local cake shop and trimmed them to size. I done this by inserting them into the cake at the points I marked and again using my edible pen, marking on the dowels the point where the dowels came out of the cake. I trimmed off the excess dowel with some strong clippers I borrowed from my dad's trusty tool box! When putting dowels in a cake, they need to be the same height as the cake, so they can just about be seen poking out of it, if you make them too high or uneven, the second layer will not sit nicely on top. I forgot to take a picture of my first layer with the dowels in but it should look something like this....
If you are inserting dowels into a cake for someone, make sure you let them know there are internal structures in the cake... just in case they don't realise and think they are edible and crack a tooth on them!


Once I had placed the dowels in the 9 inch cake, I went on to ice the 6 inch cake. I then placed the 6 inch cake on top of the 9inch cake, making sure it was centred and aligned with the inserted dowels.

I then placed my four prepared turrets at the four corners of the cake and secured them in place with edible glue.

I added a few finishing touches to the cake by adding some classic green ivy, usually found on princess castles! and some flowers.

I decided to buy a set of Disney princess figures to put on this cake so that my niece had a little keepsake afterwards that she could play with and I placed them around the cake.

And so you have it.... A princess castle fit for any little princess...


If I were to make the cake again I think I would add a few extra details on it like windows on the turrets and maybe an extra layer which has a top window and give more detail to the drawbridge at the front...

For a first attempt though... I was happy with it... Practise makes perfect as they say!

xoxo

Number plate cake

Hi all,
    Happy New Year! Hope you all had a restful and happy Christmas break.

Ive been busy baking as usually and made a few sweet treats since the new year..one of them being a cake for a friend of a friend who loves his Mercedes Benz!

I looked online for different ideas for a number plate cake and found a few that I liked. I saw this one and wanted to do something similar...


I didn't have a small rectangular cake tin so I had to improvise! I used a large rectangular baking tray, then once the cake was cooked and cooled I cut it in half and sandwiched the two pieces together like this...


Then after a little tidy up of the overspilling jam, I crumb coated the cake and chilled it for a little while.. at this stage it looked like this....


It was then time to ice the cake.. I wanted it to look similar to the picture I had found on the Internet so I went for white sugarpaste and a black border. I was asked if I could do a personalised number plate which said 'gr8 1' with a Mercedes Benz logo. To do the Mercedes Benz logo I drew out the logo on a piece of greaseproof paper and then used a scribing tool to etch the logo onto some rolled out black sugarpaste, then cut the logo out. As I didn't have any silver sugarpaste, again I had to improvise and painted the black sugarpaste silver... it could have looked better if it was sprayed silver/ used silver sugarpaste... but it done the trick!